|
|
Personal Backup Version 5.9 |
| © 2001 − 2018, Dr. J. Rathlev |
In addition to the possibilities built into the program for starting automatic backups, you can also achieve this by using Windows Task Scheduler. This method can have certain advantages:
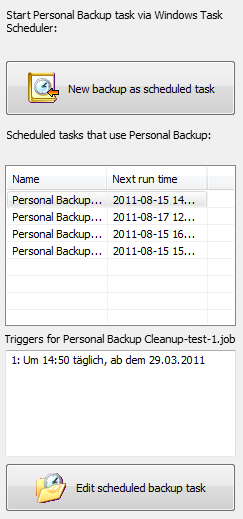
Select the Windows Scheduler tab at the top right of the program
desktop. The resultant list (see screenshot on right)
will show all Windows scheduled tasks using Personal Backup together with
their next run times.
Detailed information for a selected task will be displayed
beneath the listing.
Personal Backup version 5.9 supports the extended features of the Windows Task Scheduler available since Windows Vista. Therefore, if using the program under Windows XP, the Windows Task Scheduler wizard will not work.
 |
Click this button to start the wizard. |
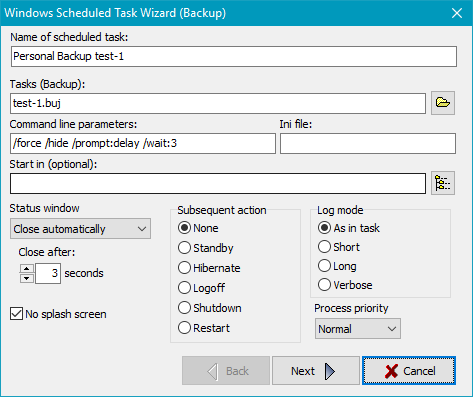
The current backup task will automatically be inserted as to be performed by
Personal Backup. You can add further backup tasks by clicking the folder
button to the right of the Tasks (Backup) field.
A special start directory (only to be used for special purposes) and a separate
ini file for this backup can be
specified if so desired.
The backup log will be written to the file specified in the
task options (default: Persbackup.log).
If no path is specified here, the ini file path will be used.
The following additional options can be selected to determine the behavior of the
program. For your information, they will automatically be displayed in the
Command line parameters field exactly as they will appear in Windows Task Scheduler.
Click the Next button to configure the schedule.
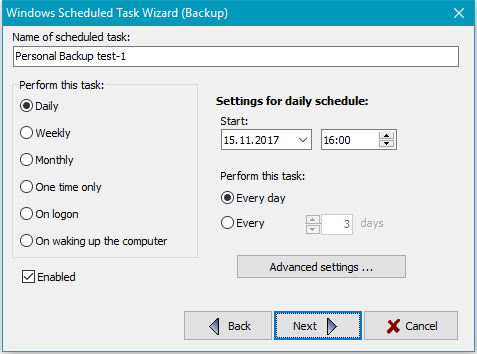
The main options are similar to those in the Windows scheduled task wizard.
To initiate a daily backup, first select the time of day this is to start and
on which date (default being the current date). By default, the backup
starts every day but optionally a preset number of days can be skipped.
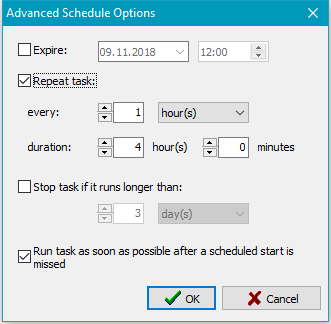
In addition, optionally you can specify the date from which no further
backups will be performed, a repeat interval with duration, a maximum runtime
and a restart if a scheduled start was missed (Advanced settings).
To enter the user account data click on Next.
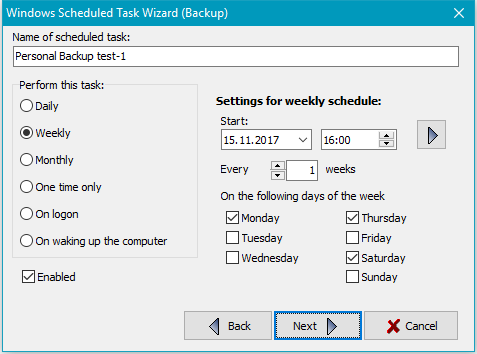
The start time and start date can be selected as described above for a daily
schedule. The backup can be started every week (default) or can skip a preset
number of weeks. In addition you can determine on which days of the week the
backup is to be performed. Clicking the upper right button will open the
Extended settings (see above).
To enter the user account data click on Next.
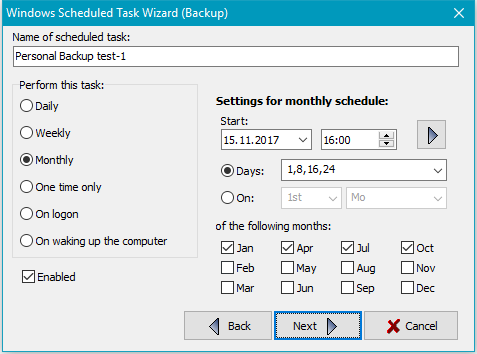
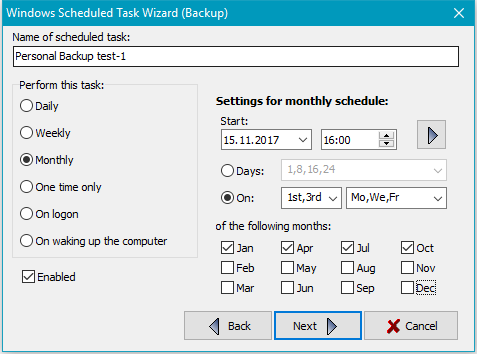
The start time and start date can be selected as described above for a daily
schedule. The backup can be started on particular days of the selected months
or on particular days of selected a week of the selected months. Clicking the
upper right button will open the Extended settings (see above).
To enter the user account data click on Next.
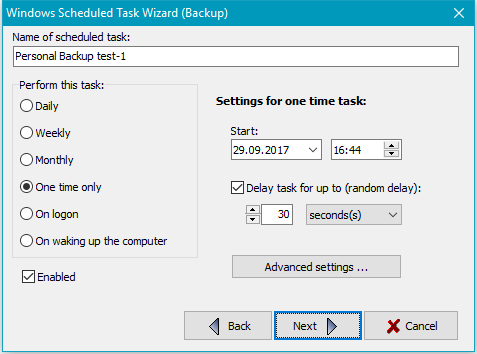
Other options for starting a backup are:
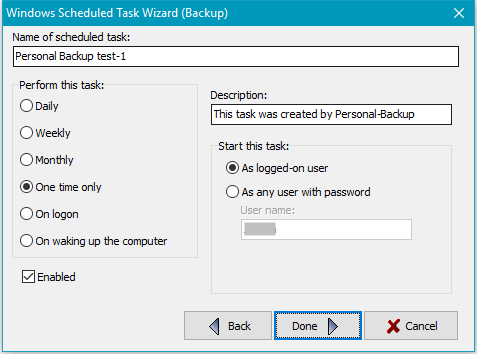
At this point you can edit the description of the task (Default:
This task was created by Personal Backup).
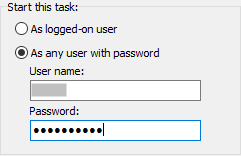
Finally, you must define how the task is to be started:
Clicking the Done button inserts this new or changed task into the list of Windows scheduled tasks and closes the wizard. You can inspect the task settings directly from Personal Backup (see below) or by using the Windows functions All Programs ⇒ Accessories ⇒ System Tools ⇒ Task Scheduler or via Control Panel ⇒ Administrative Tools ⇒ Task Scheduler.
You can configure a Windows scheduled task to carry out an automatic Verify
by clicking the ![]() button inside the Verify dialog.
The configuration procedure is the same as described above for backups.
button inside the Verify dialog.
The configuration procedure is the same as described above for backups.
You can configure a Windows scheduled task to carry out an automatic Restore
by clicking the ![]() button inside the Restore dialog.
The configuration procedure is the same as described above for backups.
button inside the Restore dialog.
The configuration procedure is the same as described above for backups.
You can configure a Windows scheduled task to carry out an automatic Cleanup
by clicking the ![]() button inside the Cleanup dialog.
The configuration procedure is the same as described above for backups.
button inside the Cleanup dialog.
The configuration procedure is the same as described above for backups.
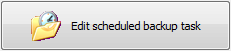 |
Click this button to reconfigure a scheduled task. |
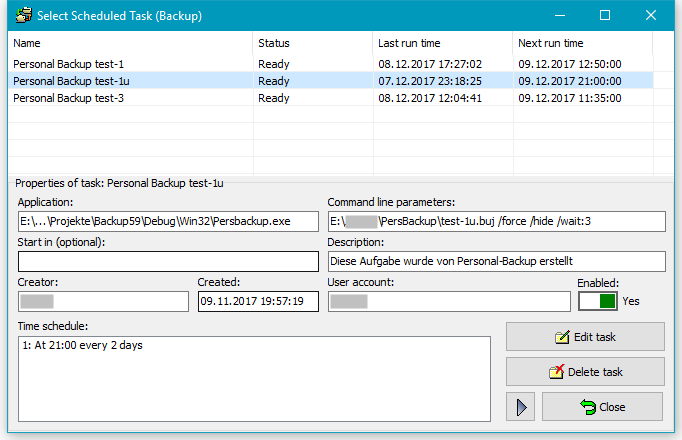
Only tasks listed in Windows Task Scheduler involving Personal Backup are
displayed in the Select Scheduled Task dialog box (see screenshot above).
The properties of the selected task are displayed in the lower part of the
window. Clicking the toggle switch on the right will enable or disable the
selected task. Click one of the buttons on the lower right to initiate one
of the following functions:
![]() Edit the settings for the selected scheduled task, e.g. the time schedule
(see above).
Edit the settings for the selected scheduled task, e.g. the time schedule
(see above).
![]() The selected scheduled task will be deleted.
The selected scheduled task will be deleted.
![]()
![]() Run the selected scheduled task immediately or stop it: If the selected
scheduled task is ready to run (left icon), clicking this button will start the task
immediately. If it is already running (right icon), the task will be stopped.
Run the selected scheduled task immediately or stop it: If the selected
scheduled task is ready to run (left icon), clicking this button will start the task
immediately. If it is already running (right icon), the task will be stopped.